

As the popularity of overlanding continues to grow, adventurers are constantly seeking ways to enhance their Jeep experiences. One of the most efficient and sustainable solutions gaining traction in the off-road community is the integration of solar panels into Jeep setups. These installations not only provide a reliable power source for various equipment but also foster a deeper connection with nature by reducing reliance on traditional fuel sources.
When embarking on an overlanding journey, ensuring a consistent power supply becomes crucial. Many Jeep enthusiasts turn to solar energy systems to keep their devices charged–be it GPS units, drones, or portable refrigerators. By harnessing the sun’s energy, users can extend their adventures without worrying about running out of battery life or depleting their vehicle’s resources. As a result, solar panel installations for Jeep overlanding have emerged as an essential component for modern-day explorers.
Installing solar panels on a Jeep can seem like a daunting task, but with the right knowledge and equipment, it becomes a manageable and rewarding project. From choosing the appropriate solar panel sizes to determining the best mounting locations on your Jeep, careful planning allows for a seamless integration that complements both your vehicle and your overlanding lifestyle. Embracing solar technology not only contributes to a more sustainable adventure but also empowers Jeep owners to create unforgettable memories in even the most remote locations.
Choosing the Right Solar Panel System for Your Jeep
When embarking on Jeep overlanding adventures, selecting the right solar panel system can significantly enhance your experience by providing eco-power for various needs. Start by assessing your energy requirements based on the appliances and devices you plan to use. Common overlanding items include refrigerators, lights, and charging stations for electronic devices. Calculate the total wattage needed to ensure your solar panel system can meet these demands.
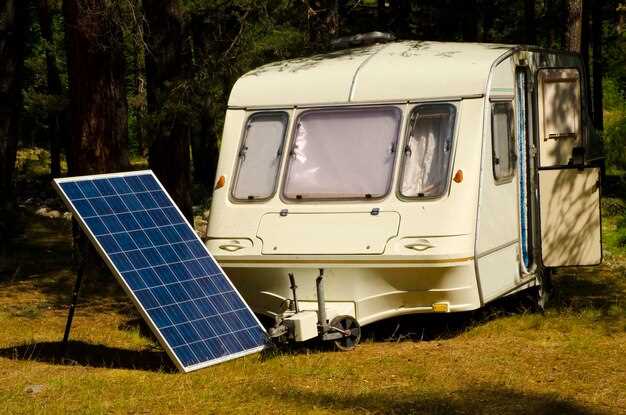
Next, consider the type of solar panels available. There are rigid and flexible options; rigid panels are generally more efficient and durable, while flexible panels can be more versatile for mounting on unconventional surfaces. Determine which type aligns better with your Jeep’s design and how you plan to use the solar power.
The solar charge controller is another critical component in your system. It regulates the voltage and current coming from the solar panels to the batteries, protecting them from overcharging. Look for a quality charge controller that matches your solar panel setup and battery type, ensuring maximum efficiency and longevity.
Batteries are essential for storing the captured solar energy. Lithium batteries are a popular choice due to their lightweight, high capacity, and longer lifespan compared to traditional lead-acid batteries. Choose a battery that can handle the anticipated energy output and fits within your space constraints.
Finally, consider the mounting and installation process. Ensure you have the necessary mounting hardware and understand how to securely attach the solar panels to your Jeep. A well-installed system will not only perform better but will also withstand the rigors of off-road adventures.
By carefully evaluating your energy needs, selecting the appropriate components, and planning for installation, you can set up an efficient solar panel system that will provide sustainable eco-power for your Jeep overlanding adventures.
Step-by-Step Guide to Installing Solar Panels on Your Jeep
Installing solar panels on your Jeep can enhance your overlanding adventures by providing reliable and eco-power for your devices and equipment. Follow this step-by-step guide for a successful installation.
Step 1: Gather Necessary Materials
Before you start, ensure you have all the required materials. You’ll need solar panels, a solar charge controller, batteries, mounting brackets, wiring, fuses, and tools such as wrenches, screwdrivers, and a drill.
Step 2: Choose the Right Solar Panels
Select solar panels that fit your power needs and can be mounted on your Jeep. Consider factors like size, weight, and wattage. Popular choices for overlanding are rigid panels or flexible solar mats, which can easily conform to your Jeep’s shape.
Step 3: Plan the Mounting Location
Identify the best location on your Jeep for the solar panels. The roof is a common choice due to its exposure to sunlight. Ensure the chosen area is free of obstructions and can withstand the weight of the panels.
Step 4: Install Mounting Brackets
Secure the mounting brackets to your Jeep according to the manufacturer’s guidelines. Use the appropriate hardware to ensure stability and alignment. Ensure the brackets can support the solar panels without adding excessive weight to your vehicle.
Step 5: Connect Wiring
Route the wiring from the solar panels to the charge controller and batteries. Use high-quality cables to minimize voltage loss. Ensure all connections are secure and waterproof to prevent corrosion and damage.
Step 6: Install the Solar Charge Controller
Mount the solar charge controller in a protected area inside the Jeep. This device will manage the power flow from the solar panels to the batteries, preventing overcharging. Connect it to the batteries following the manufacturer’s instructions.
Step 7: Connect the Batteries
Choose batteries that are compatible with your solar system. Connect the batteries to the charge controller using appropriate wiring. Confirm that all connections are tight and correct polarity is maintained to ensure efficiency and safety.
Step 8: Test the System
Once everything is connected, power on your solar system and check the charge controller for any error messages. Monitor the voltage to ensure the batteries are charging correctly. This step is crucial for confirming that your eco-power setup is functional.
Step 9: Secure Loose Wires and Panels
Double-check all connections, securing any loose wires to prevent wear or damage while on the road. Ensure the solar panels are firmly mounted to avoid vibrations that can lead to disconnection or damage.
Step 10: Enjoy Reliable Eco-Power
With your solar panels now installed, you can enjoy peace of mind knowing you have a sustainable power source for all your overlanding needs. Use your eco-power for charging devices, running lights, and any other electronic equipment during your adventures.
By following these steps, you’ll create a functional solar setup that enhances your Jeep overlanding experience, allowing you to explore more sustainably.
Maintaining Solar Power Systems During Overlanding Trips

Maintaining your solar power system while on overlanding adventures is crucial for ensuring a reliable energy source for your jeep. Proper upkeep can enhance the performance and longevity of your eco-power setup, allowing you to enjoy your trips without the worry of power shortages.
First and foremost, regular inspection of solar panels is essential. Check for dirt, dust, or debris that may accumulate on the surface. A quick cleaning with a soft cloth and water can significantly improve energy absorption, especially in remote locations where conditions can be harsh.
Next, focus on the connections and wiring. Ensure that all connections are secure and free from corrosion. Loose or corroded wires can lead to significant energy losses. Keeping a toolkit handy can facilitate quick repairs during your travels, making it easier to troubleshoot any issues that may arise.
Additionally, monitor your battery levels regularly. Familiarize yourself with the state of charge indicators to avoid over-discharging your batteries. Overloading your system with excessive energy consumption from devices can lead to battery failure. Opt for energy-efficient appliances to optimize the use of your eco-power system.
Lastly, be cautious with your solar setup in extreme weather conditions. During heavy storms or strong winds, consider folding or removing your panels if possible to prevent physical damage. Always prioritize safety and functionality to ensure your jeep remains powered throughout your adventure.


